How to Get Your First Push-Ups: Your 4-Week Plan
Ready to master push-ups? Follow my 4-week progressive plan to build strength, perfect your form, and achieve your first full push-up with confidence.

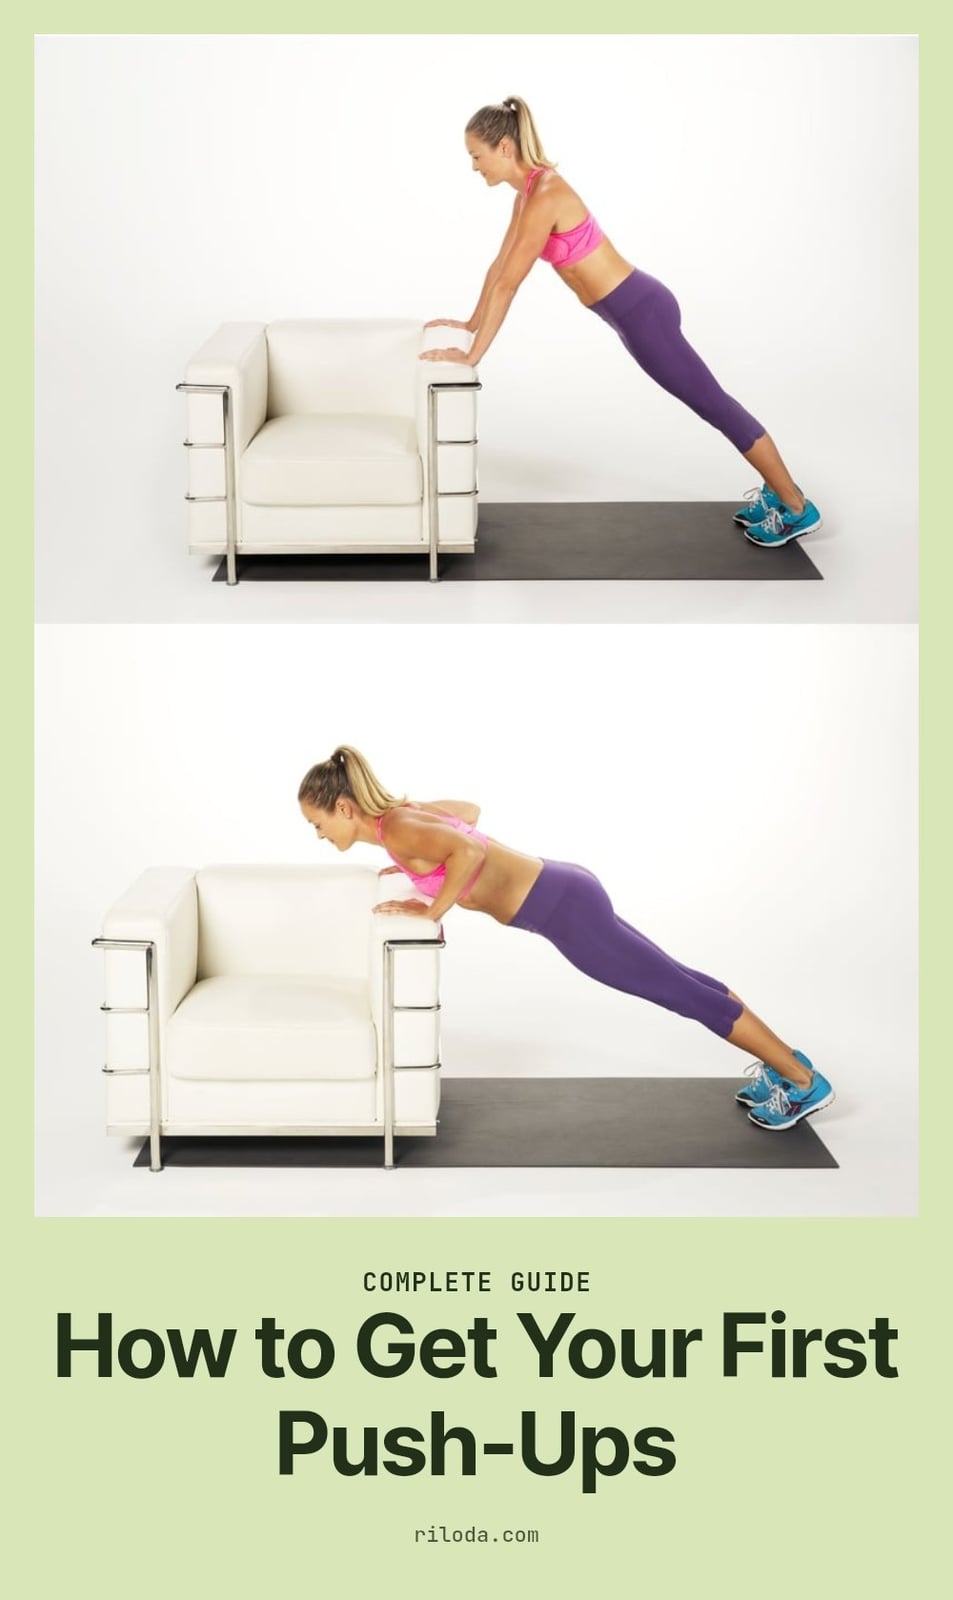
You want your first full push-up, and I’m going to show you exactly how to get there. This four-week plan starts with the easiest modifications, like wall push-ups, and builds up week by week so you never feel stuck. No gimmicks, just consistent work and proper form.
By the end of this plan, you’ll have the strength and confidence to lower yourself to the floor and push back up. Here’s how to make it happen.
Key Takeaways
- Start with wall push-ups and planks in Week 1 to build a strong foundation.
- Progress to incline push-ups on a counter or bench in Week 2.
- Master knee push-ups in Week 3 before attempting full push-ups.
- Practice 2-3 times per week with rest days for steady strength gains.
- Focus on keeping your body in a straight line and elbows at 45 degrees.
How to Get Your First Full Push-Up
Getting your first full push-up is a gradual process, not an overnight feat. I’ve seen it happen by starting with the easiest modifications, like wall push-ups or incline push-ups on a sturdy surface, to build foundational strength. The secret is focusing on proper form and engaging your core throughout every rep. Consistency matters more than intensity, so aim for 2-3 sessions per week with rest days in between.
What You’ll Need for Your Push-Up Journey

You don’t need much to start. Here’s what I keep handy:
- Exercise mat: Provides comfort during knee push-ups and planks on hard floors.
- Sturdy wall: Essential for wall push-ups, the gentlest starting point.
- Stable elevated surface: A bench, chair, or counter works for incline push-ups. Make sure it won’t slide or tip.
Understanding the Muscles Behind Your Push-Up

Which Muscles You’re Working
A push-up is a compound exercise, meaning it hits multiple muscle groups at once. The primary movers are your pectoralis major (chest), deltoids (shoulders), and triceps brachii (back of arms). Your core muscles, including the abdominals, obliques, and lower back, work hard to keep your body in a straight line from head to heels. Without that core engagement, your form collapses.
Progressive overload is how you build strength here. By gradually moving from easier modifications to harder ones, you challenge these muscles just enough to grow stronger without overdoing it.
Your Week 1 Plan: Building Foundational Strength
Week 1 is all about building the foundation: wall push-ups and planks. These two moves teach your core to hold a straight line and your arms to push, without the full weight of your body. Aim for 2-3 sessions this week, with at least one rest day between them. Form beats reps here, so slow down and check your alignment.
| Day | Exercise | Sets x Reps |
|---|---|---|
| Day 1 | Wall push-ups | 3 x 8-10 |
| Day 1 | Plank hold | 3 x 15-20 seconds |
| Day 2 | Wall push-ups | 3 x 10-12 |
| Day 2 | Plank hold | 3 x 20-30 seconds |
| Day 3 | Wall push-ups | 3 x 10-12 |
| Day 3 | Plank hold | 3 x 30 seconds |
For wall push-ups, stand arm’s length from a wall, place your hands shoulder-width apart, and lower your chest toward the wall with elbows tucked at 45 degrees. Keep your body straight from head to heels, and press back up. During planks, squeeze your glutes and pull your belly button toward your spine to avoid sagging hips. Rest 60-90 seconds between sets. If any exercise feels too easy, slow the movement down or add a few seconds to the plank hold.
Your Week 2 Plan: Progressing to Incline Push-Ups
Week 2 moves you off the wall and onto something stable but raised, like a counter, a sturdy chair seat, or a low bench. The higher the surface, the less body weight you press, so pick a height where you can complete every rep with a straight line from head to heels. As that gets comfortable, lower the surface a few inches.
| Day | Work | How it should feel |
|---|---|---|
| Day 1 | 3 sets of incline push-ups, 6-10 reps | Challenging by the last rep |
| Day 2 | 3 planks held 20-30 seconds | Core braced, hips level |
| Day 3 | 3 sets of incline push-ups, 8-12 reps | Same form, more reps |
| Day 4 | Rest or a easy walk | Recovered, not sore |
Keep to 2-3 training days with a rest day between them so your pushing muscles can recover. Add one or two reps per set only when the last rep still looks clean. The plank stays in the plan all week because a steady core is what stops your hips from sagging once you move to the floor.
Your Week 3 Plan: Mastering Knee Push-Ups
Week 3 brings you to the floor with knee push-ups, where your knees carry part of your weight so your chest and arms do less. Set your knees down, walk your hands slightly forward of your shoulders, and keep a straight line from knees to head. Don’t let your hips hinge up or your lower back dip.
| Day | Work | Focus |
|---|---|---|
| Day 1 | 3 sets of knee push-ups, 6-10 reps | Full range, chest close to floor |
| Day 2 | 3 planks held 25-35 seconds | Belly button pulled toward spine |
| Day 3 | 3 sets of knee push-ups, 8-12 reps | Elbows tucked at 45 degrees |
| Day 4 | Rest | No sharp joint pain |
Lower yourself slowly, about two seconds down, and press up with control rather than rushing. If 12 clean reps feel easy, that is your signal to try a full push-up in Week 4. Stop the set the moment your elbows flare or your hips start to drop.
Your Week 4 Plan: Towards Your First Full Push-Up
Week 4 is where you test the real thing. Start each session with a few full push-ups while you’re fresh, even if that means two or three. Then finish with knee push-ups and planks so you keep building the endurance to add reps later.
| Day | Work | Goal |
|---|---|---|
| Day 1 | 2-3 full push-ups, then 2 sets of knee push-ups, 8-10 reps | Feel the full movement |
| Day 2 | 3 planks held 30-40 seconds | Hold a rigid line |
| Day 3 | 3-4 full push-ups, then 2 sets of knee push-ups | Add one rep if form holds |
| Day 4 | Rest | Let your muscles recover |
If a full rep stalls halfway, drop to your knees and finish the set rather than forcing it. Many people reach their first full push-up somewhere in the 4-8 week range, and slower progress is normal. Count every clean rep as a win and keep the same 2-3 sessions per week.
Common Push-Up Mistakes to Avoid
I’ve seen so many people stall out on push-ups because of a handful of fixable habits, not lack of strength. Watch for these:
- Sagging hips: Your lower back dips because the core gives out. Squeeze your abs and glutes so your body stays in one straight line.
- Piking hips: Hips drift toward the ceiling to make the press easier. Lower them and keep your core engaged throughout.
- Flaring elbows: Elbows wing out to the sides and load the shoulder joint. Tuck them back at about a 45-degree angle.
- Half-repetitions: You stop a few inches down. Lower your chest as close to the floor as your form allows.
- Holding your breath: Breathe out as you push up and in as you lower, which keeps you steady.
If any of these feel hard to correct on your own, film one set from the side. It shows the hip and elbow position faster than a mirror does.
Top Tips for Push-Up Success
Listen to Your Body: Sharp pain means stop. Rest days are productive, not lazy. Aching muscles are normal, but joint pain is a sign to back off.
Focus on Form First: Five perfect push-ups build more strength than fifteen sloppy ones. I check my body line before every rep, even in modified versions.
Engage Your Core: Pull your belly button toward your spine and keep it there. This locks your body into a straight line and protects your lower back.
Practice Consistency: Two short sessions a week beat one long, random session. Your muscles need regular, predictable work to adapt.
Strengthen Your Back: Push-ups work the front, but rows or band pulls balance the back. This prevents muscle imbalances that can lead to poor posture and injury.
My tip: Set a timer for 5 minutes and do as many quality reps as you can with good form, resting when needed. It keeps sessions short and honest.
When to Consult a Professional
Consult a doctor or physical therapist if you experience sharp or persistent pain in your wrists, elbows, or shoulders during push-ups. This includes pain that doesn’t settle after a rest day.
If you have pre-existing joint conditions or injuries, get professional guidance before starting any new exercise program. A professional can help you adapt movements safely.
See a professional if you’re unsure about your form and concerned about injury. They can spot issues you can’t feel, like a subtle hip sag or improper elbow angle.
If you’re not seeing progress after consistent effort and good form for several weeks, a professional can assess if a technique tweak or strength imbalance is holding you back.
Frequently Asked Questions
How long does it take to do a full push-up?
With consistent practice 2-3 times per week, many people achieve their first full push-up within 4 to 8 weeks. Individual progress varies based on starting strength, consistency, and form. If you stick with the plan, you should see improvement each week.
Can I do push-ups every day?
It’s not recommended to do push-ups every day because your muscles need time to recover and grow stronger. Aim for 2-3 sessions per week with at least one rest day between them. This schedule helps prevent overuse injuries and allows steady progress.
What if I can’t even do a wall push-up?
If wall push-ups are too challenging, start with an even steeper angle by placing your hands on a higher surface, like a counter or a wall at chest height. You can also try wall push-ups with your feet closer to the wall to reduce the load. The goal is to find an angle where you can complete 10-12 controlled reps.
Do push-ups help with arm fat?
Push-ups strengthen and tone the muscles in your chest, shoulders, and triceps, which can make your arms look firmer over time. However, you cannot spot-reduce fat from a specific area. Combining push-ups with a balanced diet and overall exercise routine is the most effective approach for fat loss.
What’s the best way to warm up for push-ups?
A good warm-up includes 5-10 minutes of light cardio, like jumping jacks or brisk walking, to increase blood flow. Then do dynamic stretches: arm circles, wrist circles, and cat-cow stretches for your spine. Finally, try 5-10 wall push-ups at a slow pace to activate the muscles you’ll use.
Final Thoughts
My tip: stick with the plan even if you feel like you’re not making progress in the first week. Most people see real change by Week 3 or 4, and your first full push-up can happen within a few weeks. The key is consistency, not intensity. Trust the process and celebrate every small win along the way.
This article is for general informational purposes only and does not constitute medical or professional advice. Always consult a doctor or physical therapist before starting a new exercise program, especially if you have pre-existing joint conditions or injuries. Stop immediately if you experience sharp pain and seek professional guidance.
More Blog ideas
- How to Use Rose Water for Radiant Skin and Healthy Hair
- What Is My Personality Type? Understanding Yourself Better
- How to Clean Your Pores at Home
- Vitamin C Benefits for Skin and Health Plus the Best Foods
- How to Start Shadow Work for Deeper Self-Understanding
- How to Prep Your Hair Before Bleaching for Less Damage
- How to Prepare Sea Moss Gel at Home for Wellness
- How to Use Rice Water for Glowing Skin and Shiny Hair
- How to Find Morning Motivation When You Want to Stay in Bed
- Filing Nails: How to File Nails Correctly for Strong, Healthy Fingernails
- Healthy Coping Skills: Proven Strategies for Difficult Times
- Simple Ways to Romanticize Your Life Every Day